
Requirements
The server Shinydocs Pro is installed has network (local or over the internet) connectivity to the OpenText Content Server you are going to connect to
A user account in Content Server with adequate permissions to perform the analysis.
Keep your organization's password policy in mind when creating the account. This is effectively a service account, and when the password expires, you will need to update your password in Shinydocs Pro as well.
Download and install the OTCS Shinydocs Module onto your on-prem or cloud-based OpenText Content Server
The module is included in the Shinydocs Pro installation, see below
Step 1: Download and install the Shinydocs Pro Content Server module (ShinydocsService)
To get started, you will need to download and install the ShinydocsService module in your OpenText Content Server. This essential module enables Shinydocs Pro to analyze and process your Content Server data effectively.

It is very important, and the advice of Open Text, that modules are installed on all nodes in the Content Server instance. Shinydocs Pro can be connected to either a single dedicated node so as not to compete with users or through a load-balancer without issue.
Download the module files from Shinydocs Pro
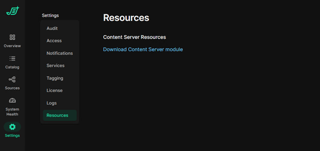
In Shinydocs Control Center click Settings then Resources
Click the link to download the Content Server Module (content-server-modules.zip)
Extract the downloaded zip file, both Windows and Linux versions of the module for Content Server are included.
Linux
ShinydocsService_1.6.21_CS16.2_CS20.x-1.6.21.gzWindows
ShinydocsService_1.6.21_CS16.2_CS20.x-1.6.21.zip
Extract the ShinydocsService_x.x.x module for your respective operating system
Step 2: Install ShinydocsService module in OpenText Content Server
The ShinydocsService module can be installed like other Content Server modules:
Extract the contents of the ShinydocsService zip file into the OpenText Content Server staging folder
Log into Content Server
Navigate to Admin >Content Server Administration
Navigate to Module Configuration
Select Install Modules
Select and install the ShinydocsService module for Content Server
Restart Content Server
Step 3: Configure Search integration
Shinydocs Search can authenticate users through OTDS using either Kerberos or OAuth 2.0 with OpenID Connect (OIDC). While both options are supported, we recommend using OAuth 2.0 with OIDC for greater flexibility, compatibility with modern identity providers like Microsoft Entra ID (Azure AD), and easier support for cloud and hybrid environments.
Select which authentication mechanism your organization would like to use, you only need to configure one (either OAuth - recommended or OTDS via Kerberos)
OAuth2 (recommended)
OAuth 2
Prepare
This setup uses OTDS as your broker to your OIDC provider, meaning Shinydocs Search will authenticate against OTDS via OIDC and OAUTH 2.
If you do not have this setup configured in your organization already, please KB0797287 from OpenText for more information. This will need to be completed before proceeding. Please contact OpenText support for more information/assistance.
OTDS Configuration
This section documents how to setup OTDS to be an OAuth client for Integrated search, so users can connect and search against Content Server.
Remember to note your Client Id and Secret made during this process, you will need it later!
Login to the OTDS Admin portal.
In the side bar click on OAuth Clients to add a new OAuth client.
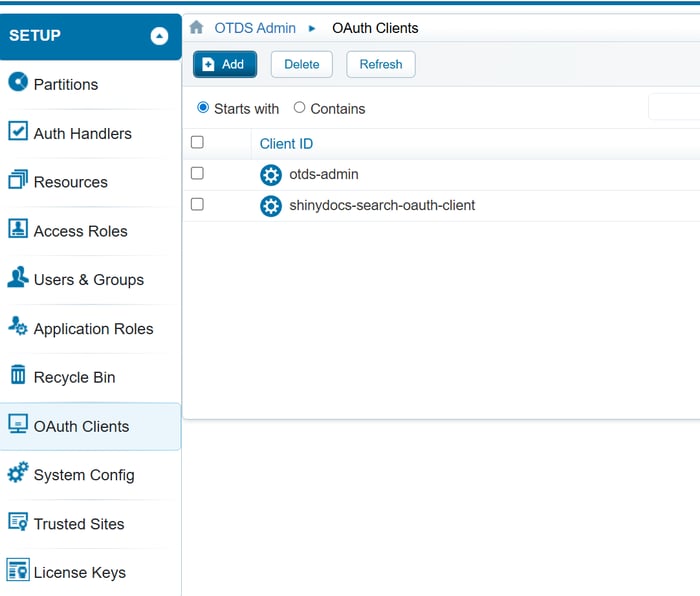
Add an OAuth Client for Shinydocs Integrated Search Click the Add Button to add a new OAuth Client
General Section - fill in the following fields
Client Id - This is an arbitrary name, however it should be unique and descriptive.
Display Name - This is an arbitrary name, however it also should be unique and descriptive
Confidential should be checked.
Authentication Method should be Client Secret
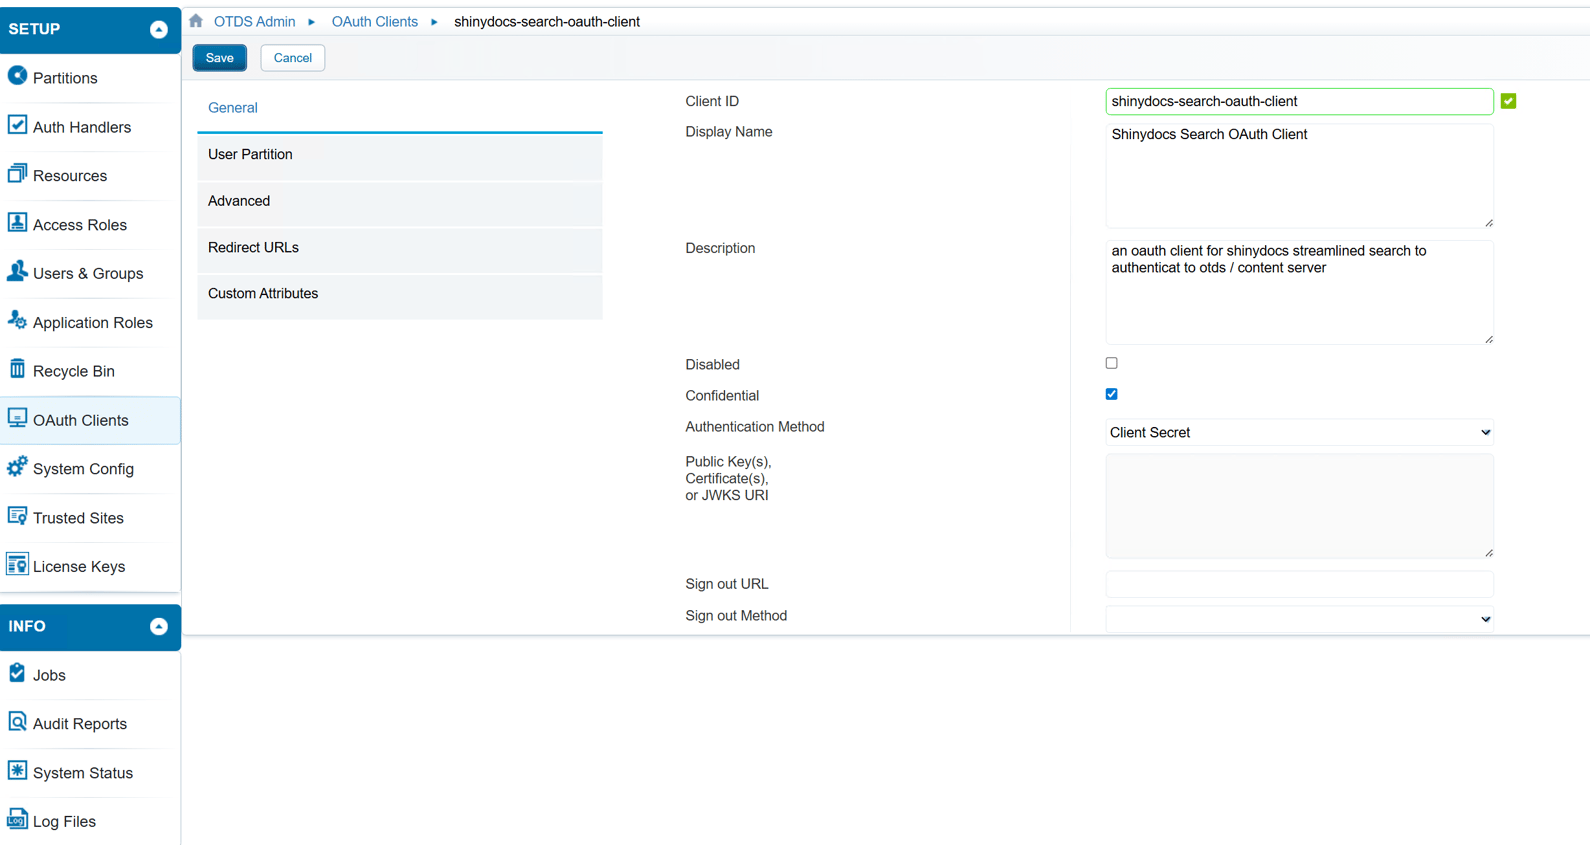
Adding an OAuth Client
User Partition - fill in the following fields
Global or User Partition. - If all your users are from the provided OAuth source, you can select Global. However, if you have a mix of authentication sources, all different, you may want to restrict it to the user partition from the source you wish to use. If so, specify the partition name in the User Partition. In the screenshot below, the partition setup for users from Entra Id is called entraid.
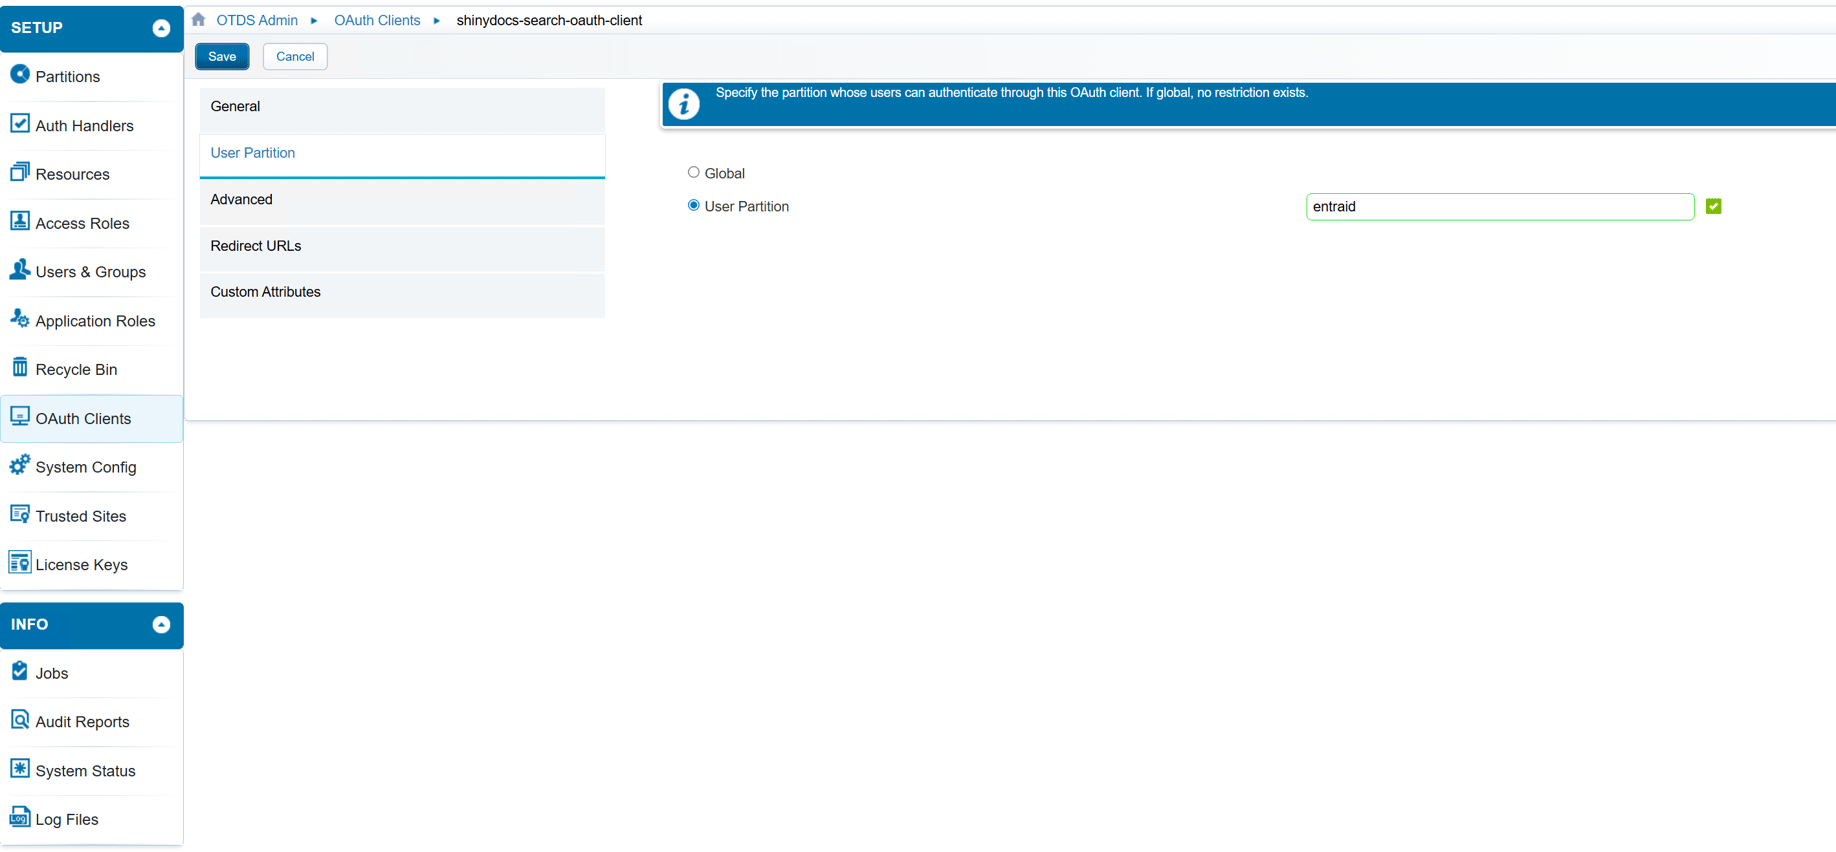
User Partition Selection
Advanced - fill in the following fields
Grant Refresh Token - checked
Permissible Scopes - openid
Default Scopes - openid
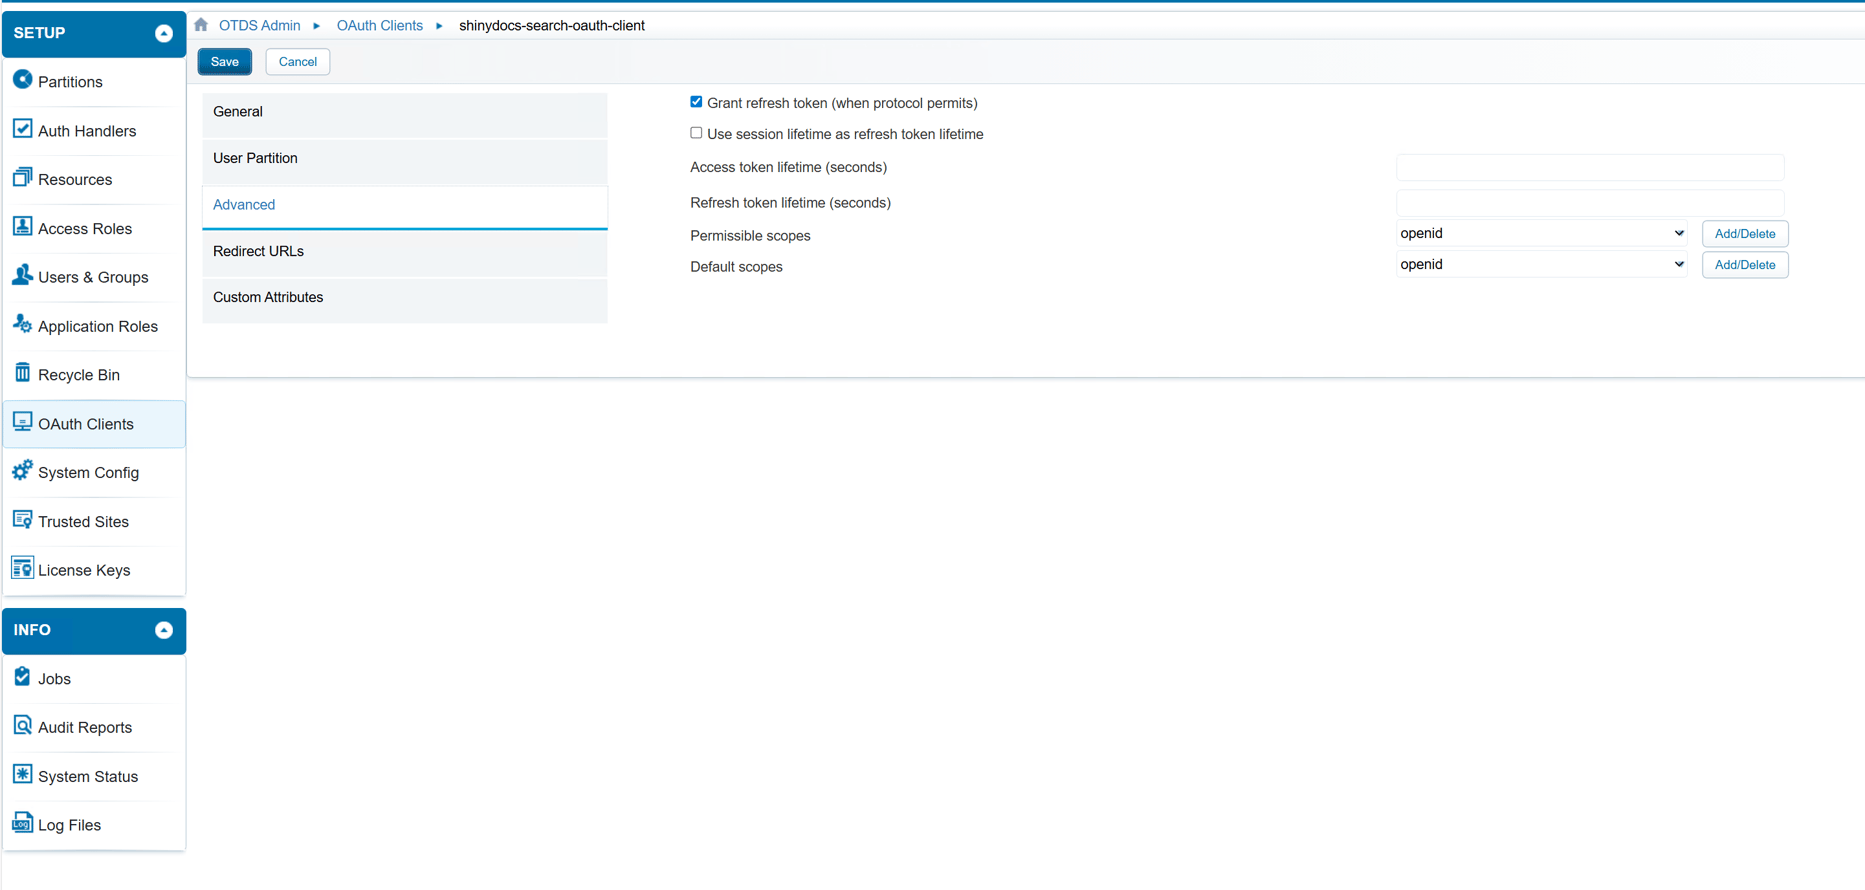
Advanced Configuration
Redirect Urls - these are permitted redirect urls that OTDS will redirect to once the user is authorized.
This should be the hostname of the integrated search with the path /oauth/authorized on the end of the url: e.g. https://search.example.cloud:9701/oauth/authorized where search.example.cloud:9701 is the host that is running control center and integrated search.
Custom Attributes - nothing to fill in there
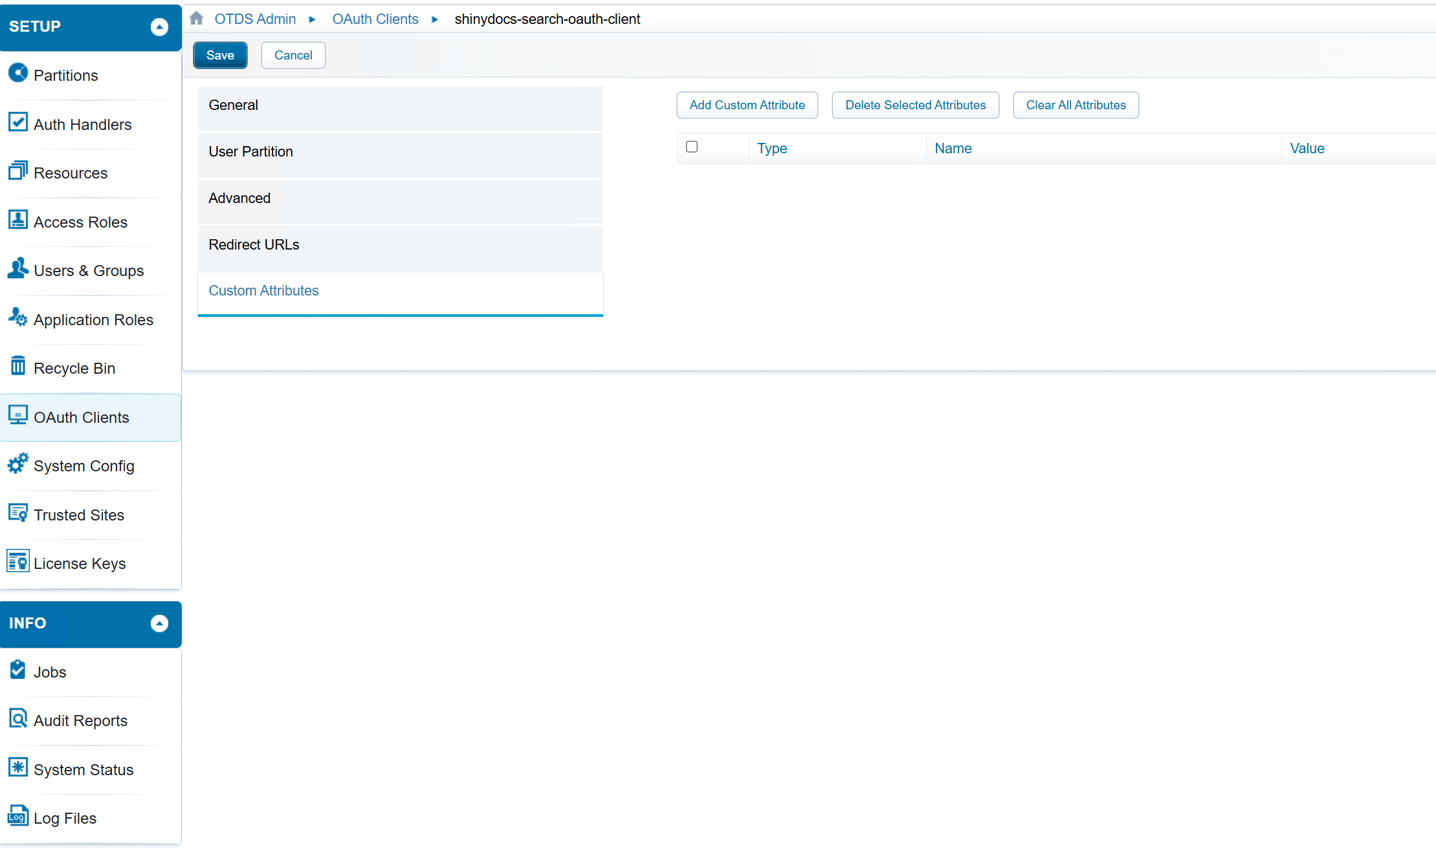
Click Save
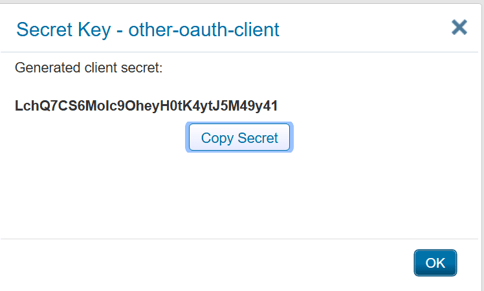
Upon save, a popup will appear showing you the Generated Client Secret. Copy this value, and put it in a safe place. You will need this later to setup integrated search.
Kerberos via OTDS
OTDS (via Kerberos)
Configure Shinydocs Search Service Account:
Account Requirements:
The "Shinydocs Control Center" process must run as a domain user account or a group-managed service account (GMSA). For more details on GMSA, refer to the Microsoft documentation.
Right-click Shinydocs Control Center in Windows Services > Properties.
Click the Log on tab and assign the service account to the service
Click OK
Grant Permissions to the Service Account:
Add the account to the local Administrators group on the server where Shinydocs Pro is installed.
Alternatively, configure the following specific permissions:
Read access to the server.
Add the account to the local "Users" group.
Full Control on the Shinydocs Search folder (default path:
C:\Program Files\Shinydocs Professional\ControlCenter).Read access to the Shinydocs Search service certificate (default certificate:
localhost.localdomain).
Grant Certificate Permissions
On the Shinydocs Pro server, open certlm.msc.
Navigate to Certificates - Local Computer > Personal > Certificates.
Locate and select
localhost.localdomain.From the menu bar, choose Action > All Tasks > Manage Private Keys.
Click Add and select the service account.
Under "Allow", checkmark Read, then click Apply.
Active Directory User Setup
Configure Delegation
Open Active Directory Users and Computers.
Locate the Shinydocs Service Account.
Right-click the account and select Properties.
Go to the Delegation tab and:
Choose Trust this user for delegation to specified services only.
Select Use Kerberos only.
Add SPNs for Delegation
Click Add to open the delegation window.
Select Users or Computers and search for the target service account.
Add the required SPNs associated with the service.
Click Apply to save changes.
Setting Service Principal Names (SPNs)
SPN Configuration Steps
Open a command prompt or PowerShell with administrative rights.
Determine the hostnames of the Shinydocs Search servers:
For single-instance setups, use the machine hostname (e.g.,
search.example.local).For load-balanced clusters, include all machine hostnames and the load balancer's DNS name (e.g.,
search01.example.local,search02.example.local,search.example.local).
Run the following commands to add SPNs:
setspn -S HTTP/Repeat for each hostname.
Authorization to OTDS (SPNs)
Set SPNs for OTDS Hosts
Run either of the following commands for each OTDS-related hostname:
OTDS Hostname:
setspn -S HTTP/OTDS Fully Qualified Domain Name (FQDN):
setspn -S HTTP/OTDS Load Balancer:
setspn -S HTTP/
Troubleshooting
Kerberos logging can be enabled by editing the following registry key:
HKEY_LOCAL_MACHINE\SYSTEM\CurrentControlSet\Control\Lsa\Kerberos\Parameters
Registry Value: LogLevel
Value Type: REG_DWORD
Value Data: 0x1
If the Parameters subkey does not exist, create it.
Further details at:https://docs.microsoft.com/en-us/troubleshoot/windows-server/identity/enable-kerberos-event-logging
The logging events will show in the System event log, in the Windows event viewer.
Ensure the SPNs have been replicated through the domain.
Ensure that the OTDS server is running as the content server user account created above, and negotiate authentication is enabled within OTDS.
Review the OTDS logs, otds.log, directory_access.log for any errors during authentication.
Step 4: Set Up Content Server Source in Shinydocs Pro Control Center
Now that the ShinydocsService module is installed on your Content Server and you have the account with appropriate permissions assigned, you’re ready to start your analysis.
In Shinydocs Control Center, click + Add source
Select OpenText Content Server, click Next
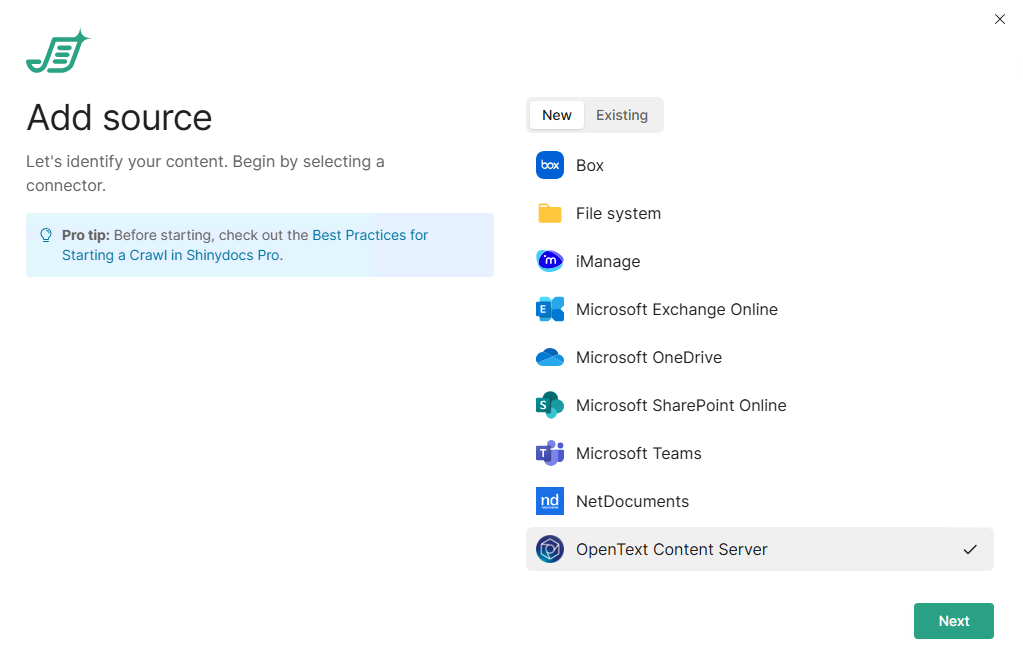
Enter the Content Server URL you wish to connect to along with the Username and password you set up in the previous section.
Hint: Your content server Url will look like http(s)://acme/otcs/cs.exe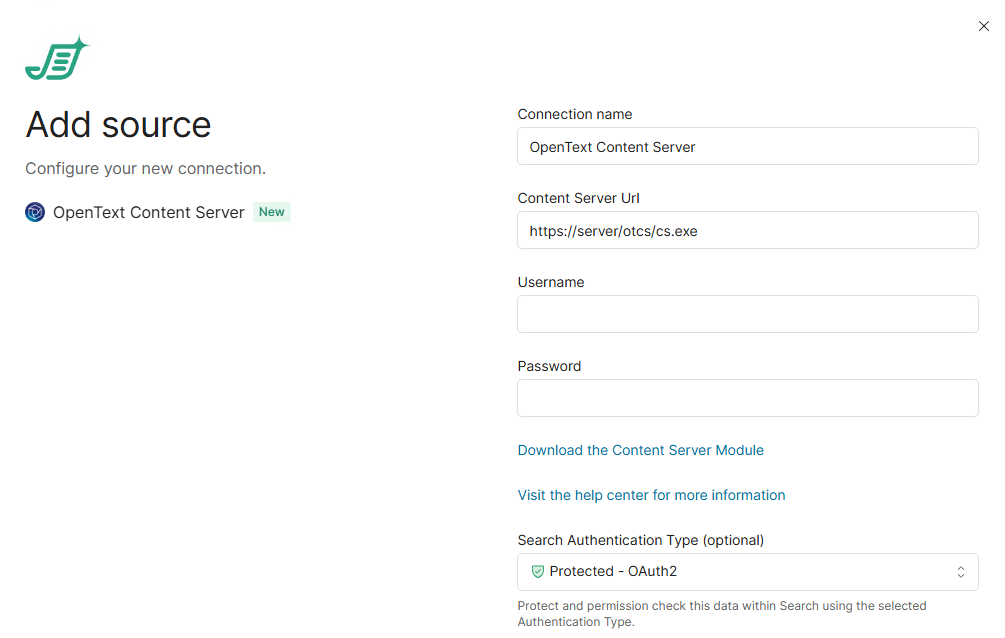
Content Server URL: The URL used to access OpenText Content Server
Note: your URL should end with /cs.exe or /llisapi.dllUsername: The username for the account you will be using
Password: The password for the account you will be using
Search Authentication Type: Either Protected - OAuth2 or Protected - OTDS
OAuth2
Fill out the following information that you would have gathered during this setup
Client Id
This is theclient idfrom Entra/AzureClient Secret
This is theclient secretfrom Entra/AzureLogin/Authorize Endpoint
e.g. https://acme.net/otdsws/oauth2/authToken Endpoint
e.g. https://acme.net/otdsws/oauth2/authRevoke Token Endpoint (optional)
e.g. https://acme.net/otdsws/oauth2/authRedirect URL
This is the URL OTDS will use to redirect users back to Integrated Search after login. It should just be the fully qualified domain name for Integrated Search (e.g.,
https://search.example.cloud:9701). The system will automatically append the correct path for OTDS authentication. Make sure this matches the hostname of the redirect URL you set in OTDS earlier.
OTDS
Enter your OTDS Server URL
e.g. http://otds-server:8080/otdsws
Click Next
On this page, you will configure what you want to analyze with Shinydocs Pro. We recommend reviewing https://help.shinydocs.com/shinydocs-pro?contextKey=introduction-to-crawling&version=latest before starting your crawl.
You have a few options for analyzing your OpenText Content Server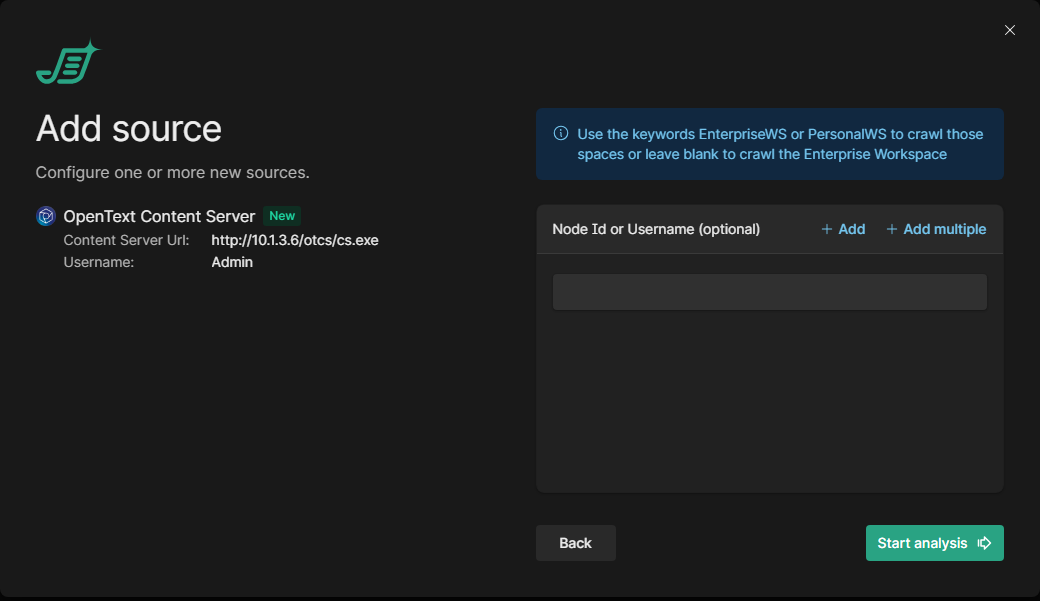
Blank - Analyze all of the Enterprise Workspace
Use the keywords EnterpriseWS or PersonalWS to initiate a crawl of all content within their respective workspaces.
Node Id - A specific folder or workspace id
This ID can be found in the URL when browsing the folder in your web browser
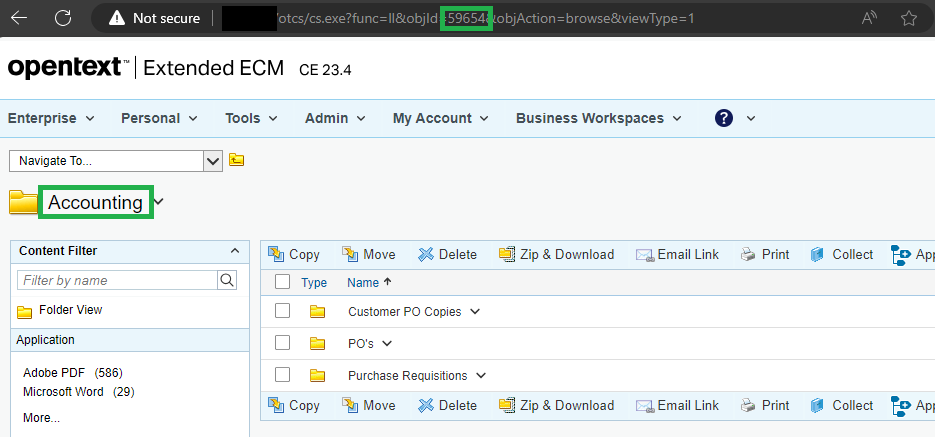
Username - A specific user’s personal workspace
More options
In Shinydocs Pro 26.1+, administrators can now by default select which analysis tools will run on the source.
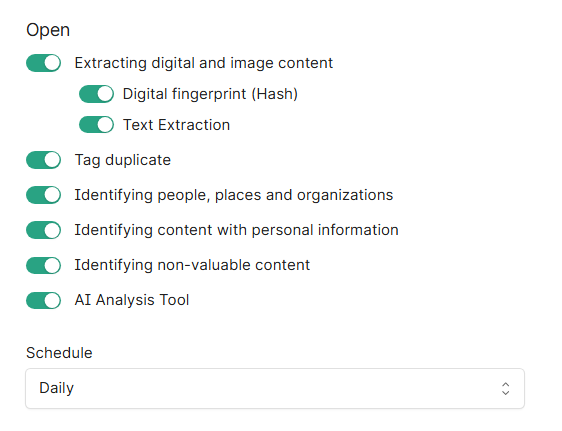
Extracting digital and image content reads file contents, including images, for analysis.
Digital fingerprint (Hash): creates a unique identifier for each file to detect exact duplicates.
Text Extraction: extracts readable text from documents for searching and analysis (includes OCR).
Tag duplicate: marks files as duplicates based on their digital fingerprint across all Shinydocs Pro sources.
Identifying people, places and organizations: detects mentions of people, locations, and organizations within document content.
Identifying content with personal information: scans for personally identifiable information like names, addresses, and social insurance/security numbers (PII).
Identifying non-valuable content: flags redundant, obsolete, or trivial (ROT) content to identify cleanup candidates.
AI Analysis Tool (license dependent, requires setup before use): employs AI for deeper content classification beyond rules.
Schedule: controls how often analysis tasks run. "Daily" runs them once per day.
Click Start Analysis to begin your crawl, congratulations!
Enable Content Server Shortcuts (optional)
Open Content Server as an administrator.
Select Admin from the top navigation.
Navigate to Content Server Administration > Core System > Presentation > Configure Document Function.
[Recommended] Check Enable Document Overview Pages.
[Optional] Configure additional options based on organizational requirements.
Save changes.
For further details, refer to the embedded PDF for information on on-click behaviour for documents in OpenText Content Server.
Application_Note_-_On-click_behavior_for_documents_on_OpenText_Content_Server.pdf