
After installing the Shinydocs Pro software package, your default browser will open to https://localhost:9701/quick-start , the landing page for new installations for Shinydocs Pro.
Getting started
User Menu
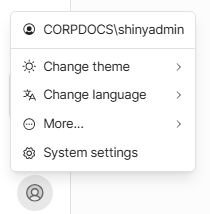
The user menu found in the top right corner of the web app, it provides quick access to key settings. From this menu, administrators can view the account in use , change the appearance and language of the app, and access additional options. These settings are stored in the browser for the administrator.
Add Your License
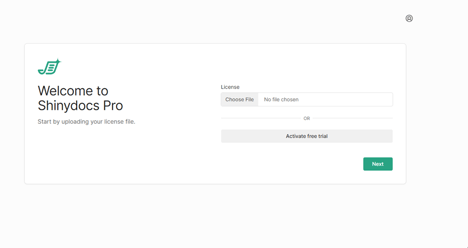
Your license file (.xml) will have been sent to your organization previously.
-
Select Choose File.
-
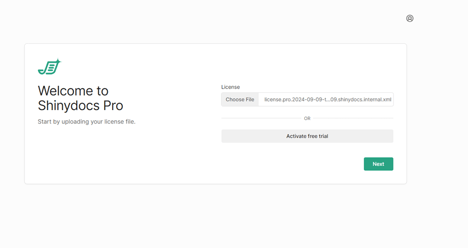
In the browse window, find your Shinydocs license file (.xml) and select Open.
-
Select Next to upload the license to the application.
-
If the activation was done successfully, you will proceed through the setup.
-
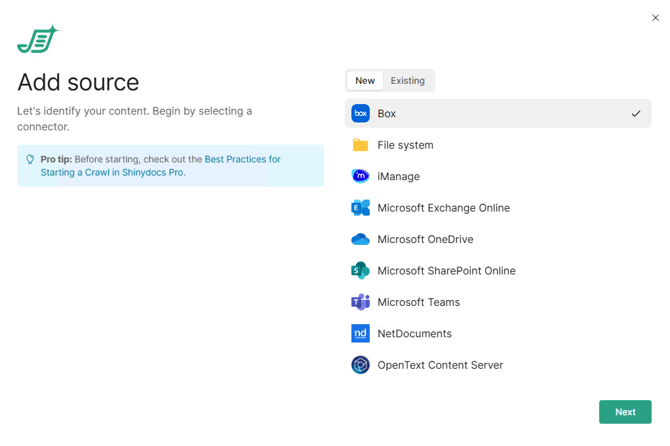
Now you can configure your data source that will be analyzed. Each supported source type will require slightly different information based on the connector. Follow our 🛠️Configure Content Sources article for detailed information on each.
-
With your first source selected, click Next.
-
Configure the connection
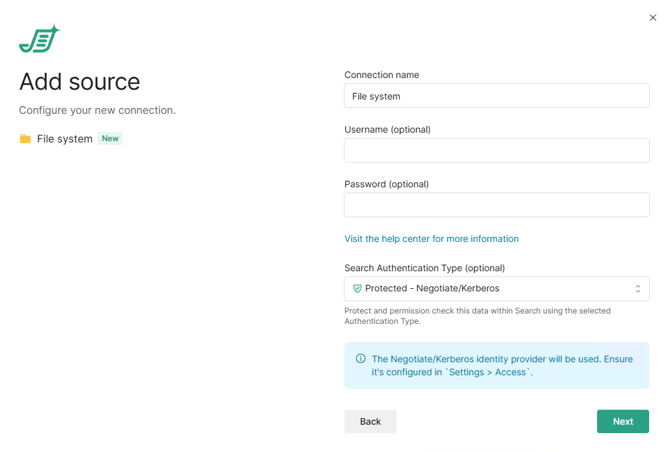
Here, you can configure the connection to the source. Each source has it’s own requirements (username, password, api keys, etc.). File system for example, a service account is generally required to access the data, use the service account credentials (domain\user). If you do not provide credentials, it will run as the computer on the network (Local System).
-
Click Next.
-
Enter the UNC (preferred) or local path (for testing) that you want to analyze.
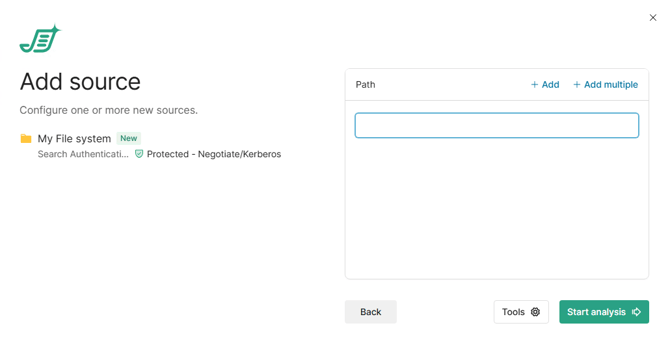
-
+ Add – Add another row (to analyze more than one path).
-
+ Add multiple – Opens a dialog window to allow you to paste multiple file paths (one path per line).
Copy and paste paths into the input box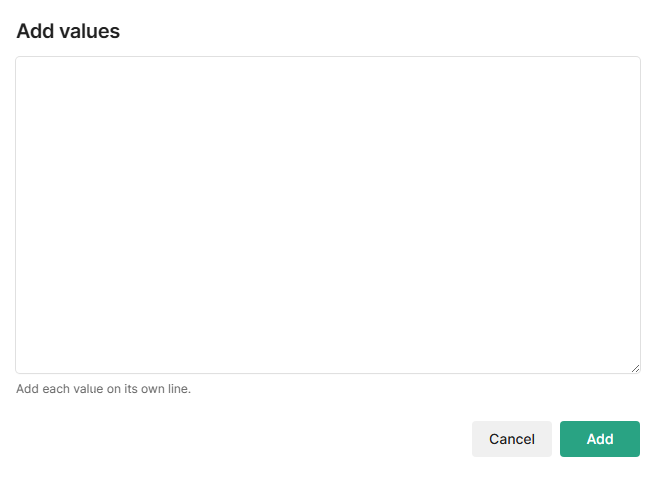
-
Tools – Toggle which analysis you would like performed. Many are dependent on Extracting digital and image content.
The Tools button may be on your version. Please contact Shinydocs Support for assistance in enabling that option. AI Analysis Tool is a licensed feature, please contact Shinydocs sales if you are interested.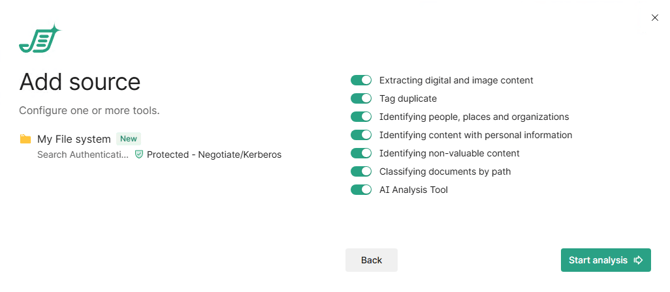
-
-
Select Start analysis and Shinydocs Control Center will start to analyze the provided file share
-
If the account you provided credentials for does not have access to the provided shares, or the credentials entered are invalid, you will get an error message indicating the problem.
-
-
Congratulations, your data is now being analyzed! The application will take you to the Overview tab. You will see the following while it starts to gather data from your configured source.
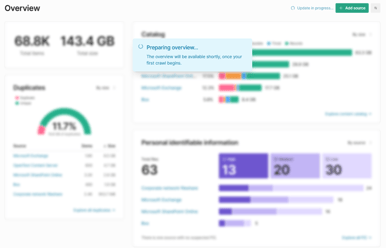
Once there is data to display from your source, the page will update automatically with the information analyzed so far.
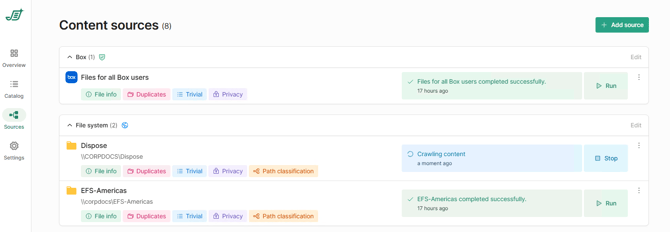
Once the data source analysis is finished (you can check the progress in Sources), Shinydocs Pro will check the source daily (default 8 pm local time) for new, modified, or deleted files and update accordingly.
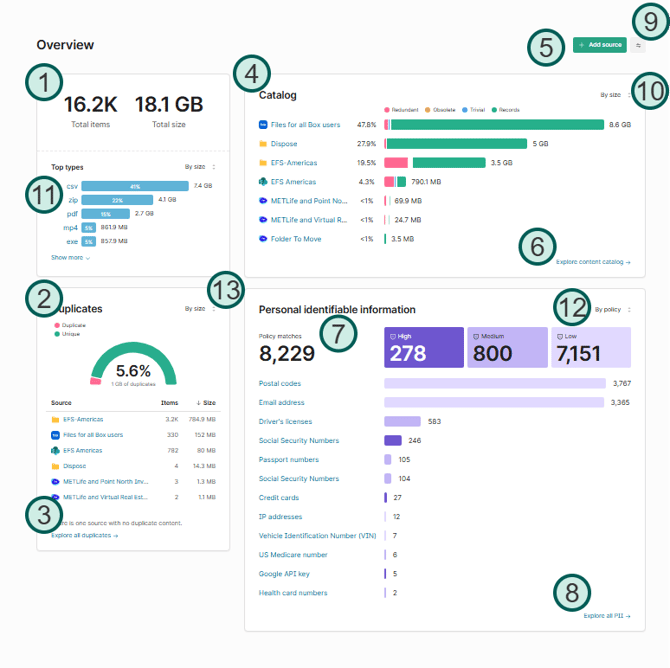
Overview of Shinydocs Control Center
Overview page
The overview tab shows all your analyzed data at a glance. From here, you can see:
-
Total items crawled.
-
Total size of items crawled.
-
Duplicates versus unique items.
-
How many and how much redundant, obsolete, and trivial data exists overall.
-
How many items contain personally identifiable information (PII) by severity.
Points of interest
Catalog
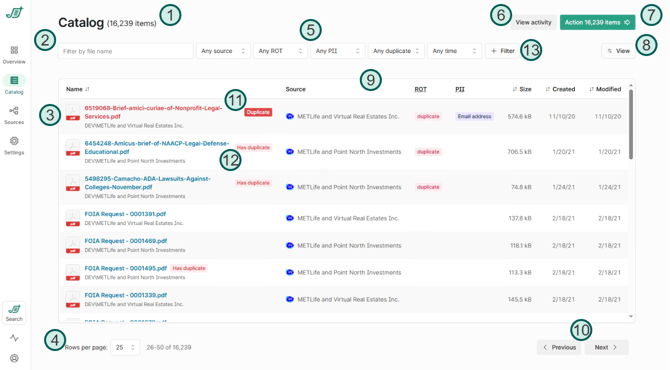
Your data catalog is where you can explore your data with helpful filters to drill into your data.
Points of interest
Duplicates view
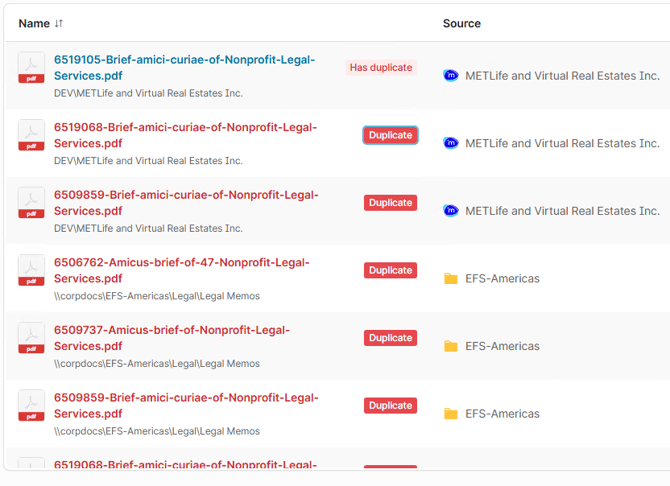
When browsing the catalog, when you find a duplicate, you can click on the red Duplicate tag to bring up all duplicates of that file. The item with the tag Has duplicate is the original (by creation date)
View activity
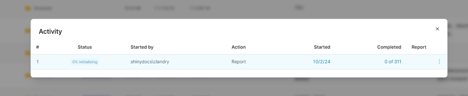
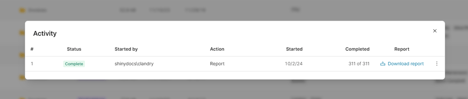
Clicking the View Activity button opens the Activity dialog. Here, you can see the current and past actions taken on your content. The dialog tracks Report and Dispose actions. Every action generates a report.
In the Activity dialog, you can:
-
Download the CSV report
-
Cancel an ongoing activity
-
Apply the same filters to the catalog view that were used when the action was submitted
Action
Clicking the Action button opens up two options: Report and Dispose.
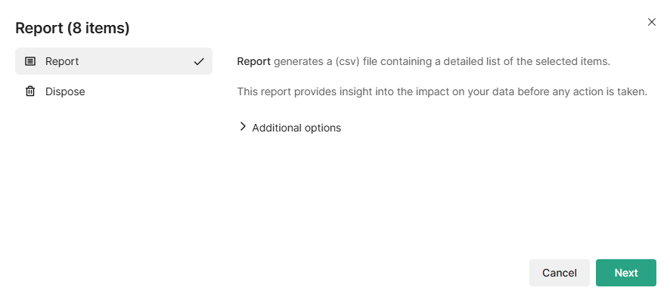
Report: Generates a CSV file with a detailed list of items in the current catalog view. This report provides a summary of your data before any changes are made.
-
Additional options
-
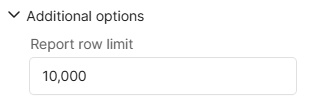
Select the drop down for additional options to change the report’s maximum row count before it rolls over
-
Dispose: Removes files from their original location. You must provide a reason for disposal, such as expired retention policies or compliance requirements. You can also verify that the content hasn't changed before proceeding. Once a disposal is confirmed, the action cannot be undone.
-
Additional options
-
Select the drop down for additional options to change the report’s maximum row count before it rolls over
-
Sources
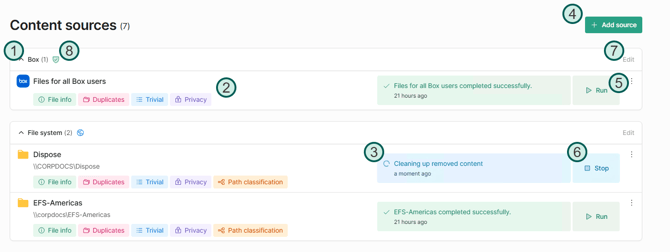
The "Sources" tab is designed to be a central view for detailed information about your configured data sources. It offers quick access to important dashboards such as File Info, Duplicates, Trivial, and Privacy. Additionally, users can view details of each step in the document analysis process and generate reports for each source.
Points of interest
Dashboards and visualizations

Click any of the icons to view the corresponding dashboard for that source, in a new tab.
File info
General overview of the file information found for the source. Here you can find total files, extension breakdown, file creation and modification trends over the last 3 years.
Duplicates
Specifically tuned to display relevant information about duplicates in your source. Explore which extensions have the most duplicates, largest duplicates, as well as duplicate creation trends.
Trivial
Discover non-essential data within your organization to free up space and minimize clutter. Sometimes, non-essential data is called "junk", which is data that's ideal for cleanup. A single file might match several criteria for being considered non-essential and will be counted multiple times. View detailed information about trivial data, the rules defining trivial data, folders with the most trivial data, and creation trends.
Privacy
Scour your data for sensitive information. View detailed breakdowns of how much data in your source has potentially personal data such as email addresses, Social Security/Insurance numbers (USA & Canada), drivers licenses, and more.
Path classification
Powerful out-of-the-box keyword classifications to automatically identify fundamental insights into how your file share content is or could be classified. The classification follow a class-subclass structure:
-
Business function
-
Content type 1
-
Record code
-
-
Content type 2
-
Record code
-
-
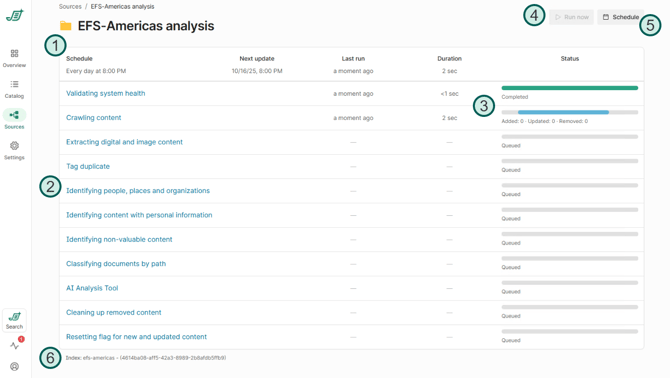
Analysis tools
Points of interest
Settings
Audit
View and filter all activities performed in Shinydocs Pro Control Center. Use the filters on the top to find specific audit information for given criteria.
Access
Configure Role Based Access (RBAC) within Shinydocs Pro. By default Negotiate is enabled. You can also use OIDC for Azure/Entra or OKTA. For information about how to set up internal access to Shinydocs Pro, check out our guide Access and Authentication in Shinydocs Pro .
Notifications
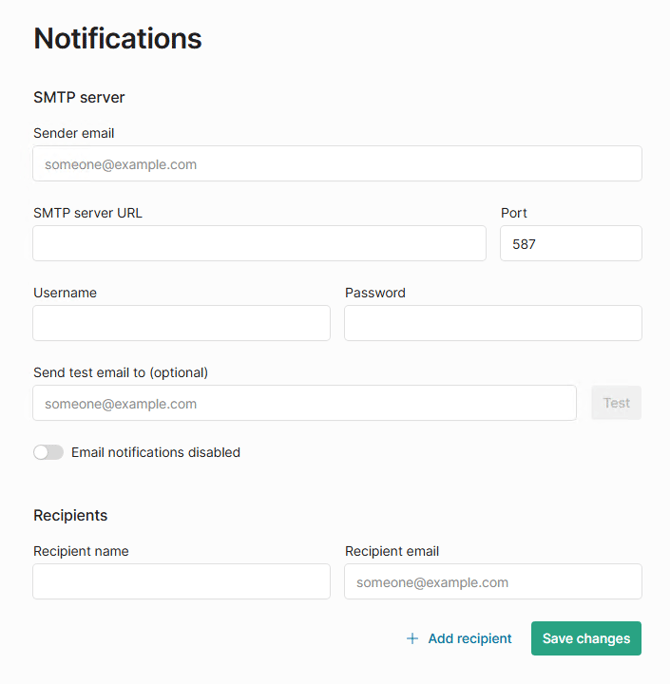
Add email accounts to get notifications of activity within Shinydocs Control Center.
Services
Caution: modifying these values could result in the application becoming inoperable. Make sure you know what you are doing here.
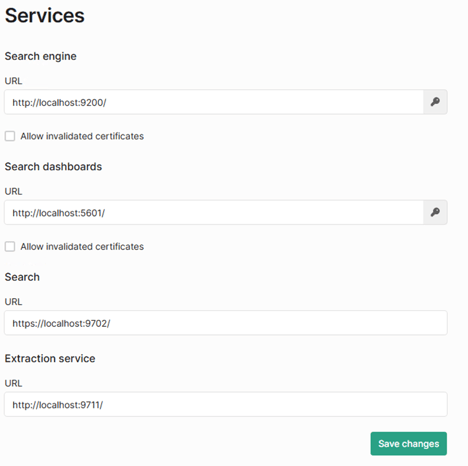
View and edit services used by Shinydocs Pro. On an initial installation, these settings should not need to be modified.
Click the  icon to edit authentication details.
Search Engine
Search dashboards
Search
default: https://localhost:9702/
The URL endpoint for Shinydocs Search service.
Extraction service
default: https://localhost:9711/
The URL endpoint for Shinydocs Extraction service.
Tagging
The Tagging page is where you can configure which ROT (Redundant, Obsolete, Trivial) and PII (Personally Identifiable Information) rules run on your data sources (global setting for all sources).
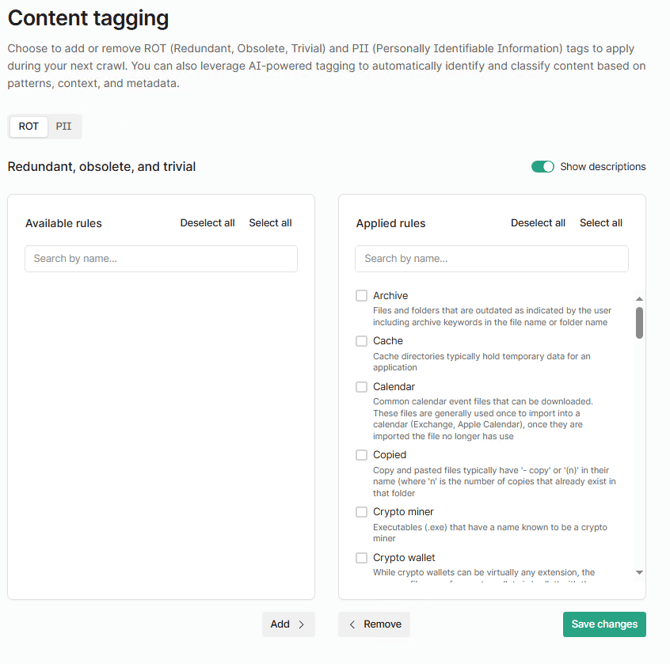
Available rules
Rules that are not being applied to your content (these rules are disabled).
Applied rules
Rules that are applied to your content (these rules are enabled)
All rules are enabled by default, any custom rule file will in the Available section. Select the checkboxes of the rules you wish to add or remove, and click on the associated Add or Remove button. Remember to save your changes!
License
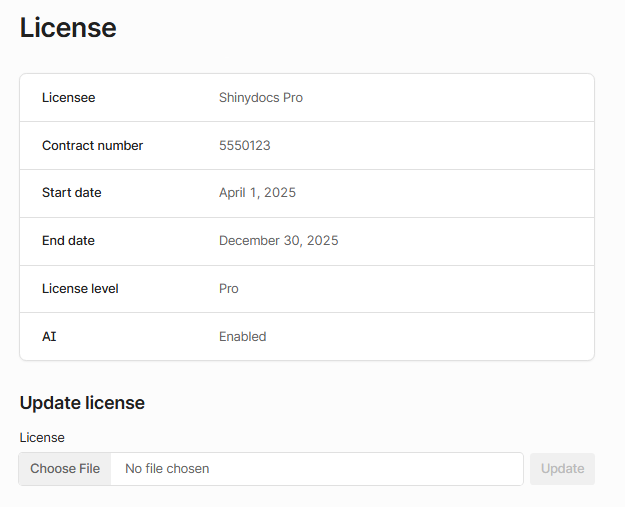
View your current license status for Shinydocs Pro or upload a new license.
Logs
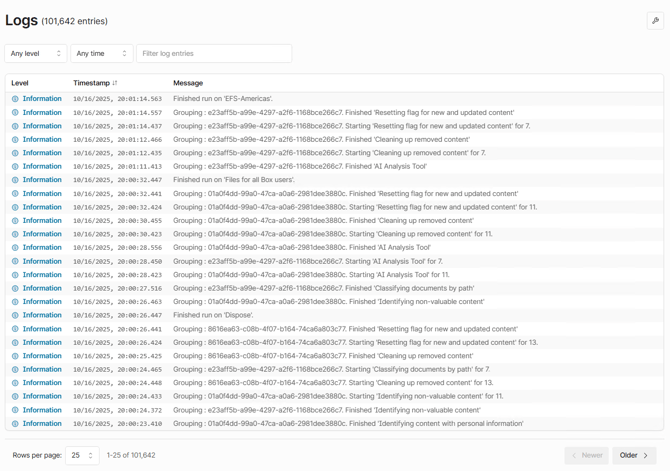
View Control Center logs for troubleshooting. Use the  button to download Control Center logs. If you are opening a help desk ticket with Shinydocs, be sure to include a copy of the log files.
Search
Instantly access Shinydocs Search, the perfect enterprise search tool for your organization. You will be able to search across your analyzed sources, including document content (for supported documents). Results are permission checked in real time with your data source, so users will only be able to see what they are permissioned to see (based on the source permissions).
For more information, please visit: 🔎Configure Search